
RecyclerView is a ViewGroup that helps us to display a scrollable list of elements. It is one of the most used UI components in the Android apps and it involves having a data source, an adapter, and the RecyclerView. Other than displaying the content, RecyclerView is efficiently reusing the views that have scrolled off the screen by recycling them.

📃Components Overview
- Data source – list of objects that could be obtained from a local database, or as a result of a http request, or even it could be a list with some predefined values.
- RecyclerView is a scrolling list for list items and to have access at it we must add some dependencies in the gradle file
- Layout for one item of data – XML file
- Layout manager handles the organization of UI components in a view (there are 3 predefined ways to display the items)
- View holder has view information for displaying one item
- Adapter connects data to the RecyclerView
- Set the Adapter to the RecyclerView and we are done 🙂

LayoutManager
- All view groups have layout managers
- Positions item views inside a RecyclerView
- Reuses item views that are no longer visible to the user
- Built-in layout managers include LinearLayoutManager, GridLayoutManager, and StaggeredGridLayoutManager
- For RecyclerView, it extends RecyclerView.LayoutManager

Adapter
- We are talking about applying the adapter design pattern as an intermediary between the source data we want to display and the view
- Adapter is a structural design pattern that allows objects with incompatible interfaces to collaborate
- Responsibile to create, updade, add and delete items from the list
- It suppose to implement the abstract class RecyclerView.Adapter
ViewHolder
- Used by the adapter to prepare one item view for each element from the datasource
- The layout of the item is specified in an XML resource file, it’s like a 1:1 relation between the view and the element from the list of objects provided as a datasource
- Can have clickable elements and it is placed by the layout manager
- We must implement the abstract class RecyclerView.ViewHolder
👩🏻💻Implementation steps
- Get the data by creating a new object class (data source)
- Add the RecyclerView dependency to app/build.gradle file and add RecyclerView to layout
- Create XML layout for item
- Define the LayoutManager in activity
- Extend RecyclerView.ViewHolder in a separated class
- Extend RecyclerView.Adapter in a separated class
- In onCreate of activity, create a RecyclerView with adapter and layout manager
To cover the implementation steps we will display a list of emails. The datasource is hardcoded, right now we are focusing on learning how to use RecyclerView.
Step 1: Get the data by creating a new object class (data source)
| public class Email { | |
| private int id; | |
| private String fromName; | |
| private String subject; | |
| private String shortBody; | |
| public Email(int id, String fromName, String subject, String shortBody) { | |
| this.id = id; | |
| this.fromName = fromName; | |
| this.subject = subject; | |
| this.shortBody = shortBody; | |
| } | |
| public int getId() { | |
| return id; | |
| } | |
| public void setId(int id) { | |
| this.id = id; | |
| } | |
| public String getFromName() { | |
| return fromName; | |
| } | |
| public void setFromName(String fromName) { | |
| this.fromName = fromName; | |
| } | |
| public String getSubject() { | |
| return subject; | |
| } | |
| public void setSubject(String subject) { | |
| this.subject = subject; | |
| } | |
| public String getShortBody() { | |
| return shortBody; | |
| } | |
| public void setShortBody(String shortBody) { | |
| this.shortBody = shortBody; | |
| } | |
| @Override | |
| public String toString() { | |
| return "Email{" + | |
| "id='" + id + '\'' + | |
| ", fromName='" + fromName + '\'' + | |
| ", title='" + subject + '\'' + | |
| ", shortBody='" + shortBody + '\'' + | |
| '}'; | |
| } | |
| } |
| private void inbox() { | |
| emails = new ArrayList<>(); | |
| Email email = null; | |
| for (int i = 0; i < 25; i++) { | |
| email = new Email(0, "Magda " + i, "Hello Android " + i, "This is an intro about Android"); | |
| emails.add(email); | |
| } | |
| } |
Step 2: Add the RecyclerView dependency to app/build.gradle file and add RecyclerView to layout
| implementation 'androidx.recyclerview:recyclerview:1.2.0-beta01' |
| <?xml version="1.0" encoding="utf-8"?> | |
| <LinearLayout xmlns:android="http://schemas.android.com/apk/res/android" | |
| android:layout_width="match_parent" | |
| android:layout_height="match_parent" | |
| android:orientation="vertical"> | |
| <androidx.recyclerview.widget.RecyclerView | |
| android:id="@+id/recyclerViewEmails" | |
| android:layout_width="match_parent" | |
| android:layout_height="match_parent" /> | |
| </LinearLayout> |
Step 3: Create XML layout for item
| <?xml version="1.0" encoding="utf-8"?> | |
| <LinearLayout xmlns:android="http://schemas.android.com/apk/res/android" | |
| xmlns:tools="http://schemas.android.com/tools" | |
| android:layout_width="match_parent" | |
| android:layout_height="wrap_content" | |
| android:orientation="vertical" | |
| android:id="@+id/linearLayoutEmail" | |
| android:padding="@dimen/small_padding"> | |
| <TextView | |
| android:id="@+id/textViewFrom" | |
| android:layout_width="match_parent" | |
| android:layout_height="wrap_content" | |
| android:textStyle="bold" | |
| tools:text="Magda" /> | |
| <TextView | |
| android:id="@+id/textViewSubject" | |
| android:layout_width="match_parent" | |
| android:layout_height="wrap_content" | |
| android:paddingTop="@dimen/extra_small_padding" | |
| android:textColor="@color/purple_700" | |
| tools:text="Android Fundamentals" /> | |
| <TextView | |
| android:id="@+id/textViewBody" | |
| android:layout_width="match_parent" | |
| android:layout_height="wrap_content" | |
| android:paddingTop="@dimen/extra_small_padding" | |
| tools:text="this is a welcome email …." /> | |
| </LinearLayout> |
Step 4: Define the LayoutManager in activity
| private void setEmailsLayoutManager() { | |
| recyclerViewEmails.setLayoutManager(new LinearLayoutManager(this)); | |
| } |
Step 5: Extend RecyclerView.ViewHolder in a separated class
| public class EmailViewHolder extends RecyclerView.ViewHolder{ | |
| private final TextView textViewFrom, textViewSubject, textViewBody; | |
| private final LinearLayout linearLayoutEmail; | |
| public EmailViewHolder(@NonNull View itemView) { | |
| super(itemView); | |
| textViewFrom = itemView.findViewById(R.id.textViewFrom); | |
| textViewSubject = itemView.findViewById(R.id.textViewSubject); | |
| textViewBody = itemView.findViewById(R.id.textViewBody); | |
| linearLayoutEmail = itemView.findViewById(R.id.linearLayoutEmail); | |
| } | |
| public TextView getTextViewFrom() { | |
| return textViewFrom; | |
| } | |
| public TextView getTextViewSubject() { | |
| return textViewSubject; | |
| } | |
| public TextView getTextViewBody() { | |
| return textViewBody; | |
| } | |
| public LinearLayout getLinearLayoutEmail() { | |
| return linearLayoutEmail; | |
| } | |
| } |
Step 6: Extend RecyclerView.Adapter in a separated class
| public class EmailAdapter extends RecyclerView.Adapter<EmailViewHolder> { | |
| private List<Email> emails; | |
| private Context context; | |
| public EmailAdapter(Context context, List<Email> emails) { | |
| this.emails = emails; | |
| this.context = context; | |
| } | |
| // creates the items and add them to the RecyclerView, just the layout | |
| @NonNull | |
| @Override | |
| public EmailViewHolder onCreateViewHolder(@NonNull ViewGroup parent, int viewType) { | |
| View itemView = LayoutInflater.from(context).inflate(R.layout.email_item, parent, false); | |
| return new EmailViewHolder(itemView); | |
| } | |
| // binds (displays) the content from the list of emails for each item | |
| @Override | |
| public void onBindViewHolder(@NonNull EmailViewHolder holder, int position) { | |
| Email currentEmail = emails.get(position); | |
| holder.getTextViewFrom().setText(currentEmail.getFromName()); | |
| holder.getTextViewSubject().setText(currentEmail.getSubject()); | |
| holder.getTextViewBody().setText(currentEmail.getShortBody()); | |
| } | |
| // we tell to the Recycler View how many items to display | |
| @Override | |
| public int getItemCount() { | |
| return emails.size(); | |
| } | |
| } |
Step 7: In onCreate of activity, create a RecyclerView with adapter and layout manager
| private void setEmailsAdapter() { | |
| recyclerViewEmails.setAdapter(new EmailAdapter(this, emails)); | |
| } | |
| private void displayEmailsList() { | |
| // data source – checked | |
| inbox(); | |
| // layout manager – checked | |
| setEmailsLayoutManager(); | |
| // adapter – checked | |
| setEmailsAdapter(); | |
| } |
🔔Notify the Adapter

To not impact the speed of rendering the UI elements for a RecyclerView make sure that you’re not calling notifyDataSetChanged(), setAdapter(Adapter), or swapAdapter(Adapter, boolean) for small updates. [official recommendation] The solution is to use SortedList or DiffUtil to create minimal updates when the datasource has changed.
| public class EmailDiffCallback extends DiffUtil.Callback { | |
| private List<Email> oldList; | |
| private List<Email> newList; | |
| public EmailDiffCallback(List<Email> oldList, List<Email> newList) { | |
| this.oldList = oldList; | |
| this.newList = newList; | |
| } | |
| @Override | |
| public int getOldListSize() { | |
| return oldList.size(); | |
| } | |
| @Override | |
| public int getNewListSize() { | |
| return newList.size(); | |
| } | |
| @Override | |
| public boolean areItemsTheSame(int oldItemPosition, int newItemPosition) { | |
| // add a unique ID property on Email and expose a getId() method | |
| return oldList.get(oldItemPosition).getId() == newList.get(newItemPosition).getId(); | |
| } | |
| @Override | |
| public boolean areContentsTheSame(int oldItemPosition, int newItemPosition) { | |
| Email oldEmail = oldList.get(oldItemPosition); | |
| Email newEmail = newList.get(newItemPosition); | |
| if (oldEmail.getFromName() == newEmail.getFromName() && oldEmail.getSubject() == newEmail.getSubject() && oldEmail.getShortBody() == newEmail.getShortBody()) { | |
| return true; | |
| } | |
| return false; | |
| } | |
| } |
| // NOT OK | |
| void onNewEmailsArrivedNotRecommended(List<Email> newEmails) { | |
| emailAdapter.setEmails(newEmails); | |
| emailAdapter.notifyDataSetChanged(); | |
| } | |
| // OK | |
| void onNewDataArrivedFastRendering(List<Email> newEmails) { | |
| List<Email> oldEmails = emailAdapter.getEmails(); | |
| DiffUtil.DiffResult result = DiffUtil.calculateDiff(new EmailDiffCallback(oldEmails, newEmails)); | |
| emailAdapter.setEmails(newEmails); | |
| result.dispatchUpdatesTo(emailAdapter); | |
| } |
✨Item decorators
We could set dividers between the items using DividerItemDecoration
| private void setItemDecorator() { | |
| RecyclerView.ItemDecoration itemDecoration = new | |
| DividerItemDecoration(this, DividerItemDecoration.VERTICAL); | |
| recyclerViewEmails.addItemDecoration(itemDecoration); | |
| } |

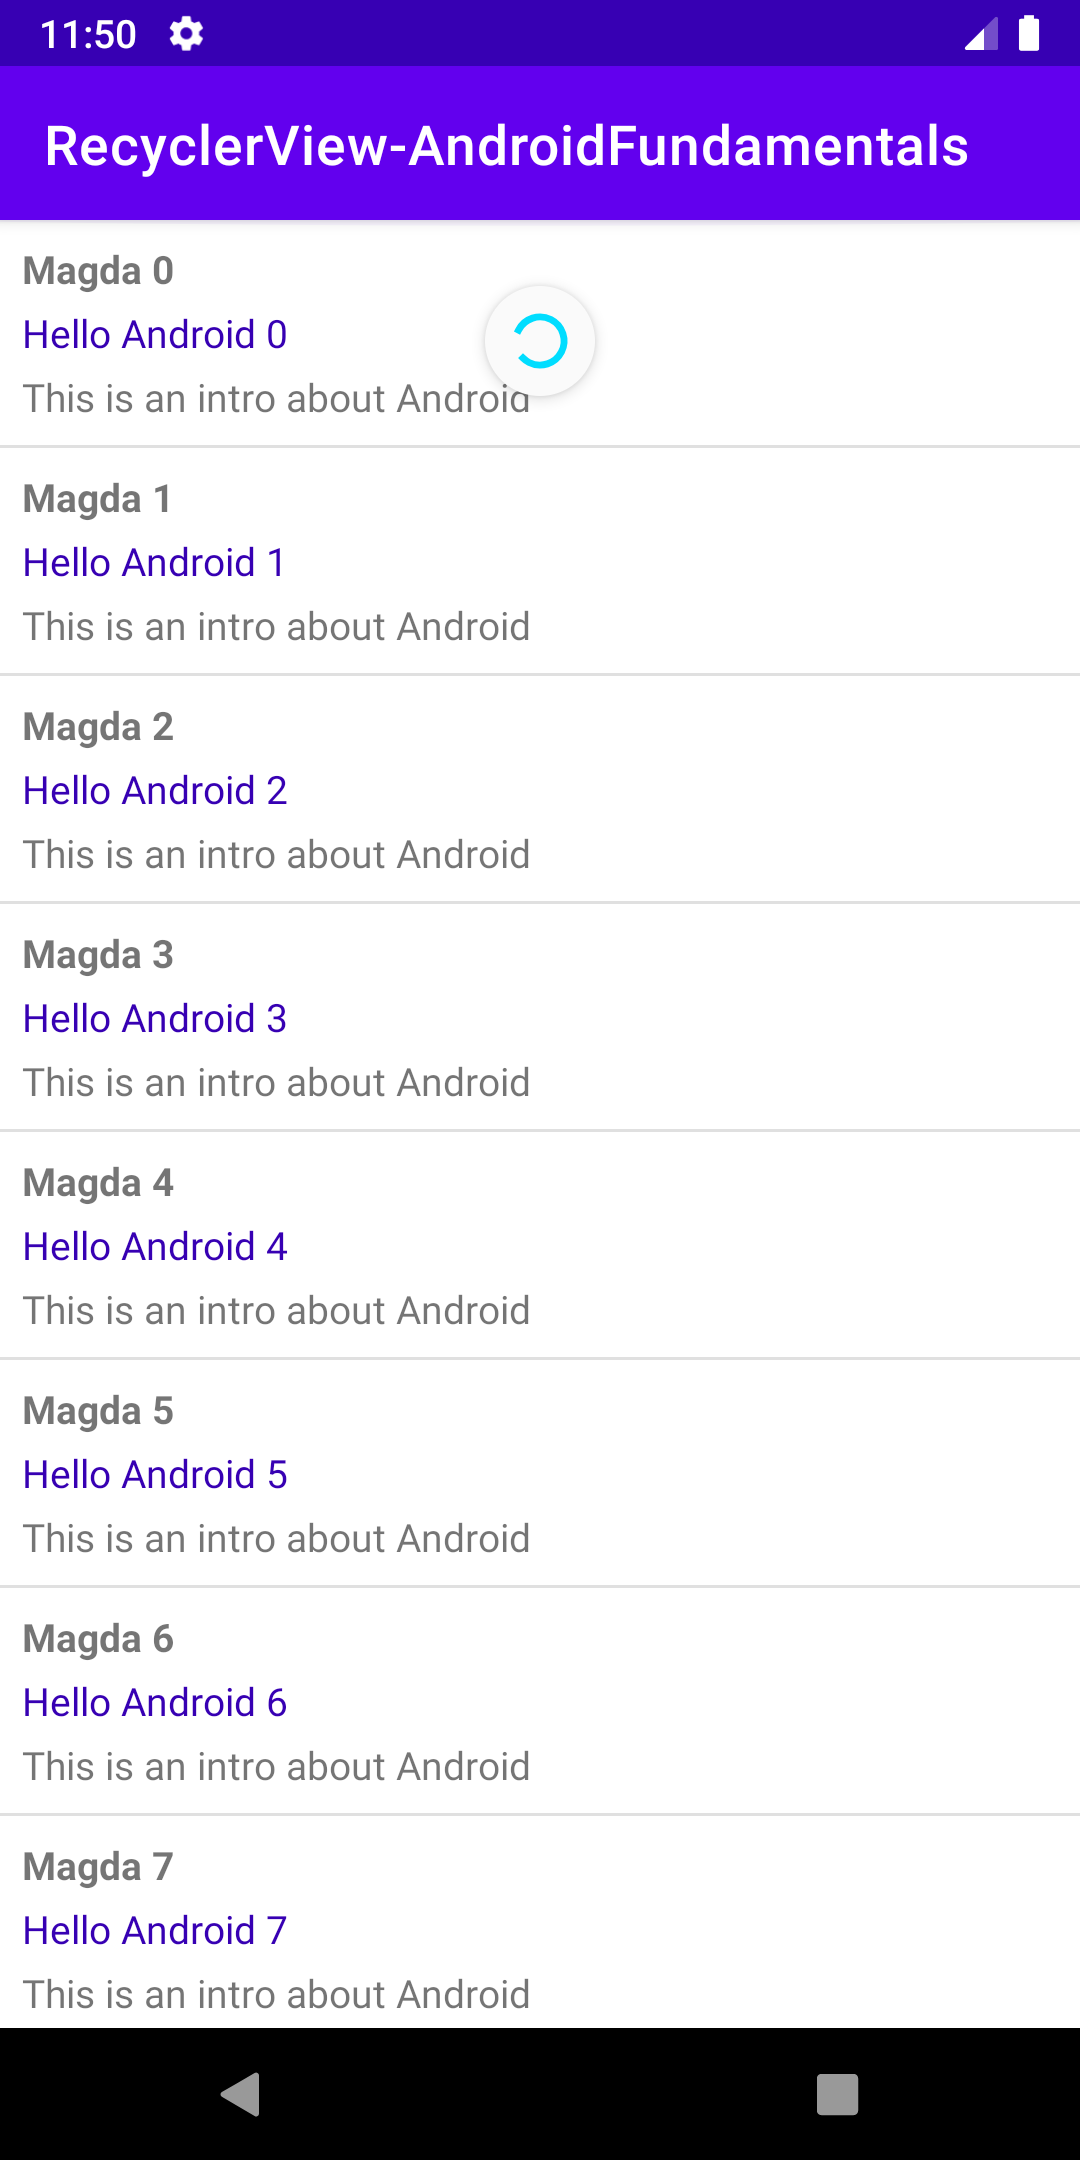
💫Swipe to refresh
Step 1: Add a new dependency in the gradle file
| implementation 'androidx.swiperefreshlayout:swiperefreshlayout:1.1.0' |
Step 2: Wrap the RecyclerView in a SwipeRefreshLayout
| <?xml version="1.0" encoding="utf-8"?> | |
| <androidx.swiperefreshlayout.widget.SwipeRefreshLayout xmlns:android="http://schemas.android.com/apk/res/android" | |
| android:id="@+id/swipeContainer" | |
| android:layout_width="match_parent" | |
| android:layout_height="match_parent"> | |
| <androidx.recyclerview.widget.RecyclerView | |
| android:id="@+id/recyclerViewEmails" | |
| android:layout_width="match_parent" | |
| android:layout_height="match_parent" /> | |
| </androidx.swiperefreshlayout.widget.SwipeRefreshLayout> |
Step 3: Update the code in the Adapter
| // Clean all elements of the recycler | |
| public void clear() { | |
| emails.clear(); | |
| notifyDataSetChanged(); | |
| } | |
| // Add a list of items | |
| public void addAll(List<Email> list) { | |
| emails.addAll(list); | |
| notifyDataSetChanged(); | |
| } |
Step 4: Setup SwipeRefreshLayout
| private void setupSwipeToRefresh() { | |
| swipeRefreshLayout.setOnRefreshListener(new SwipeRefreshLayout.OnRefreshListener() { | |
| @Override | |
| public void onRefresh() { | |
| // Make sure you call swipeRefreshLayout.setRefreshing(false) | |
| // once the network request has completed successfully. | |
| inbox(); | |
| } | |
| }); | |
| // Configure the refreshing colors | |
| swipeRefreshLayout.setColorSchemeResources(android.R.color.holo_blue_bright, | |
| android.R.color.holo_green_light, | |
| android.R.color.holo_orange_light, | |
| android.R.color.holo_red_light); | |
| } |
You could check the full source code here.
📚Learn more
- Android Vitals – Slow Rendering
- Create dynamic lists with RecyclerView
- RecyclerView ins and outs – Google I/O 2016
- Yigit Boyar: Pro RecyclerView
Enjoy and feel free to leave a comment if something is not clear or if you have questions. And if you like it please share!
Thank you for reading! 🙂
Follow me on: Twitter | Medium | Dev.to

Awesome description for RecyclerView! Thanks
LikeLike
Thank you for the recyclerView breakdown.
LikeLike